Advanced Shapes: Parametric Controls
Every basic shape is also a starting point. With parametric controls, you can cut, hollow, twist, taper, and shear your prims into something entirely different -- and change your mind at any time.
The Build Panel's Shape tab gives you basic primitives -- boxes, spheres, cylinders, and more. But the real creative power comes from the parametric deformation controls: a set of sliders that reshape any prim without destroying or replacing it. Think of them as non-destructive sculpting tools. A box becomes a door frame. A cylinder becomes a spiral staircase. A torus becomes an arch.
The key insight: every change is reversible. Slide a parameter to zero and you are back to the original shape. There is no "undo history" to worry about -- the shape is always generated fresh from the current slider values.
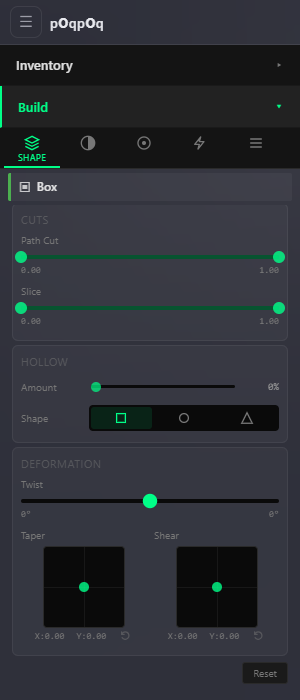
How It Works
Every prim is built from two things: a profile (the cross-section shape) and a path (the direction the profile is extruded along). A box has a square profile pushed along a straight line. A torus has a circular profile swept around a ring. The parametric controls let you modify both the profile and the path independently.
Profile controls change the cross-section: cut a wedge out of it, punch a hole through its center, or change the shape of that hole. Path controls change how the profile is extruded: twist it, taper it, lean it sideways, or remove a section of the extrusion entirely.
Profile Controls: Changing the Cross-Section
These controls modify the shape you see if you were to slice the prim in half and look at it head-on.
Path Cut (Profile on the torus family)
Removes a pie-slice wedge from the cross-section. You set a begin and end point, and everything between them is cut away -- like slicing a pizza and removing a piece. On a cylinder, this gives you a Pac-Man shape. On a sphere, it opens up a bowl or dome.
The panel labels this control Path Cut on boxes and cylinders, and Profile on torus, tube, and ring -- same idea, different name per family.
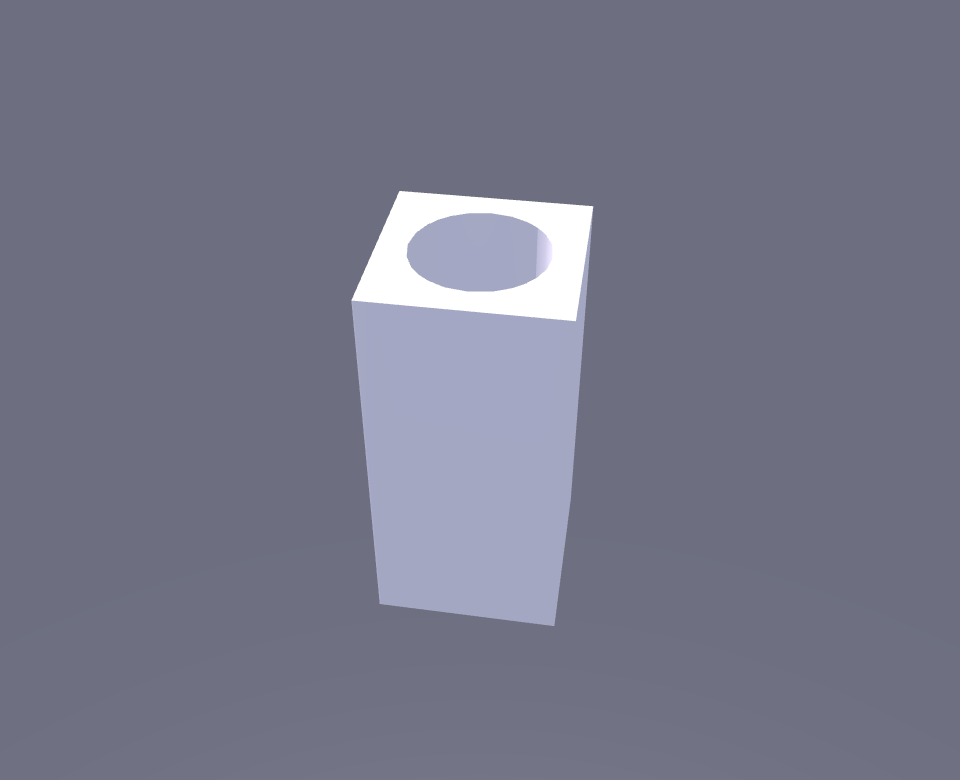
Hollow
Punches a hole straight through the center of the prim, from top to bottom. The hollow percentage controls how big the hole is -- 0% is solid, 95% leaves paper-thin walls. This is how you make pipes, picture frames, tunnels, and hollow towers.
The hole shape does not have to match the prim shape. The Shape selector always offers three profiles, and the choices adapt to the prim you have selected:
- Same -- The default. The hole matches the prim's own cross-section: a square hole through a box, a round hole through a cylinder or torus.
- Circle or Square -- The alternate profile: a box offers Circle (a round bore through a cube), while cylinders and the torus family offer Square.
- Triangle -- Available on every shape. Unusual but useful for decorative openings and geometric patterns.
Path Controls: Changing the Extrusion
These controls modify how the cross-section is pushed through space. They turn simple shapes into complex architectural and decorative elements.
Slice (Path on the torus family)
Removes a section of the extrusion itself. On a box or cylinder the panel calls this Slice: it cuts horizontally -- you might cut away the top third to make a low wall. On the torus family the same knob is labeled Path: it removes an arc segment, turning a full ring into a C-shape or a half-circle. Set the begin and end points to control which portion is kept.
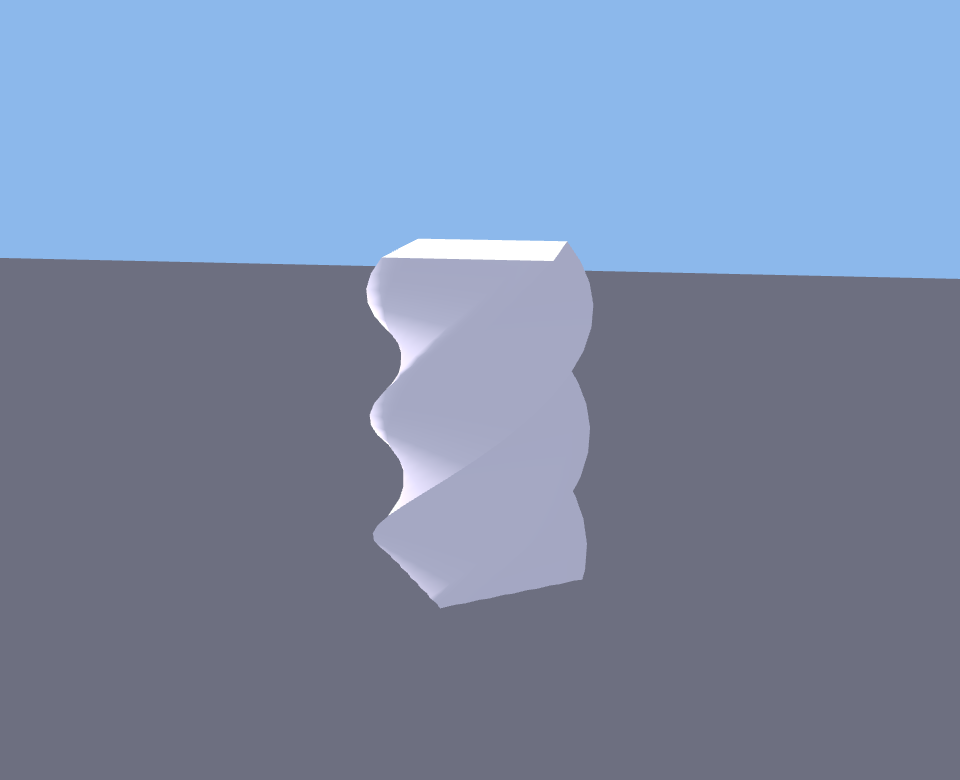
Twist
Rotates the cross-section progressively along the extrusion path. A box with 90 degrees of twist turns into a gentle spiral. Crank it to 360 degrees and you get a full helical revolution. You can set different twist values at the begin and end of the path, so the twist can accelerate, reverse, or stay constant.
Twist goes up to 360 degrees in either direction -- plenty for spiral staircases, twisted columns, candy cane stripes, and decorative railings.
Twist exists on straight-path shapes only (box, cylinder, prism). The torus family has no Twist control -- its deformation card offers Skew, Revolutions, Radius Delta, and Hole Size instead (see Ring and Torus Controls below).
Taper
Shrinks or grows the cross-section along the path. A box tapered on both axes becomes a pyramid. A cylinder tapered on one axis becomes a wedge or a funnel. Taper works independently on X and Y, so you can create asymmetric shapes -- narrow on one axis but full-width on the other.
Negative taper values flip the effect, making the top larger than the bottom. This is useful for creating flared bases and trumpet shapes.
Shear
Offsets the top of the prim sideways relative to the bottom, without changing the shape of either end. A box with shear becomes a parallelogram. Shear works on X and Y independently, so you can lean the top forward, sideways, or diagonally. This is how you make leaning towers, slanted roofs, and italic-style text blocks.
Skew
Leans the entire extrusion path sideways. Where shear offsets just the top, skew bends the whole path into a curve, tilting the ring into an elliptical orbit. Skew appears on the torus family's deformation card (torus, tube, ring) with a range of -0.95 to 0.95 -- straight-path shapes do not have it.
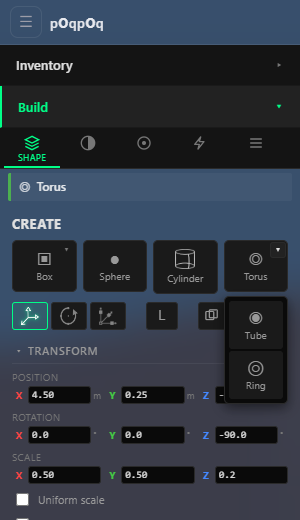
Ring and Torus Controls
Torus, tube, and ring shapes have their own deformation set because their path wraps around in a circle rather than going in a straight line. Their deformation card offers Skew, Revolutions, Radius Delta, and Hole Size X/Y, plus the same Taper and Shear drag-pads as the straight-path shapes. (There is no Twist control on the torus family.)
| Control | Range | What It Does |
|---|---|---|
| Skew | -0.95 to 0.95 | Leans the ring's path sideways, tilting it toward an elliptical orbit. |
| Revolutions | 1 to 4 | How many times the profile wraps around. At 1, you get a simple ring. At 2 or more, the ring spirals into a coil -- like a spring or a slinky. |
| Radius Delta | -1 to 1 | Makes the ring spiral inward or outward as it revolves. Combined with multiple revolutions, this creates spiral ramps and nautilus shapes. |
| Hole Size X | 0.05 to 1 (default 1) | Adjusts the ring's proportions along one axis of the cross-section. |
| Hole Size Y | 0.05 to 1 (default 0.25) | Adjusts the ring's proportions along the other axis. |
| Taper / Shear | XY pads | The same drag-pads as on straight-path shapes, applied around the ring. |
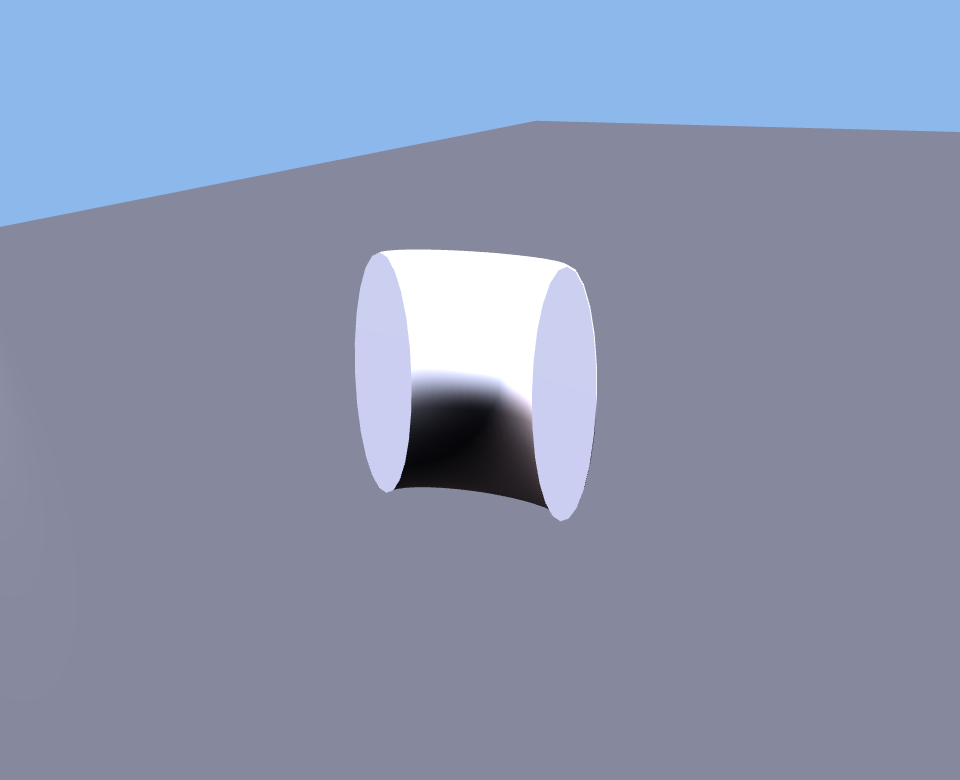
Heads-up: the Hole Size controls currently behave unpredictably -- raising Hole Size Y can grow the tube inward and close the central hole entirely, and lowering Hole Size X can flatten the whole ring rather than narrowing the hole. This is a known issue under investigation. Until it settles, treat these two sliders as experimental and lean on the Path cut, scale, and the other controls for predictable results.
Practical Examples
Here are common things builders make with parametric controls, along with the settings that produce them.
Door Frame
Start with a Box. Set Hollow to around 80% and leave the hollow shape on Same (a square hole, matching the box). You now have a rectangular frame. Scale it to the size of a doorway and position it in your wall. The hollow creates the opening; the remaining material is the frame.
Spiral Staircase
Start with a Box. Set Twist to 360 degrees (or more for tighter spirals). Make the box tall and thin -- the twist wraps it around itself like a ribbon. Adjust the width to control tread depth and the twist amount to control how many steps fit in one revolution.
Arch
Start with a Torus. Set Path (the torus's second cut slider) to keep only the top half (begin at 0.25, end at 0.75 -- experiment to taste). You now have a half-ring arch: the two flat cut faces become its feet. Scale it to fit over a doorway or bridge. The Path cut alone gets you there -- hold off on the Hole Size sliders for now (see the heads-up above).
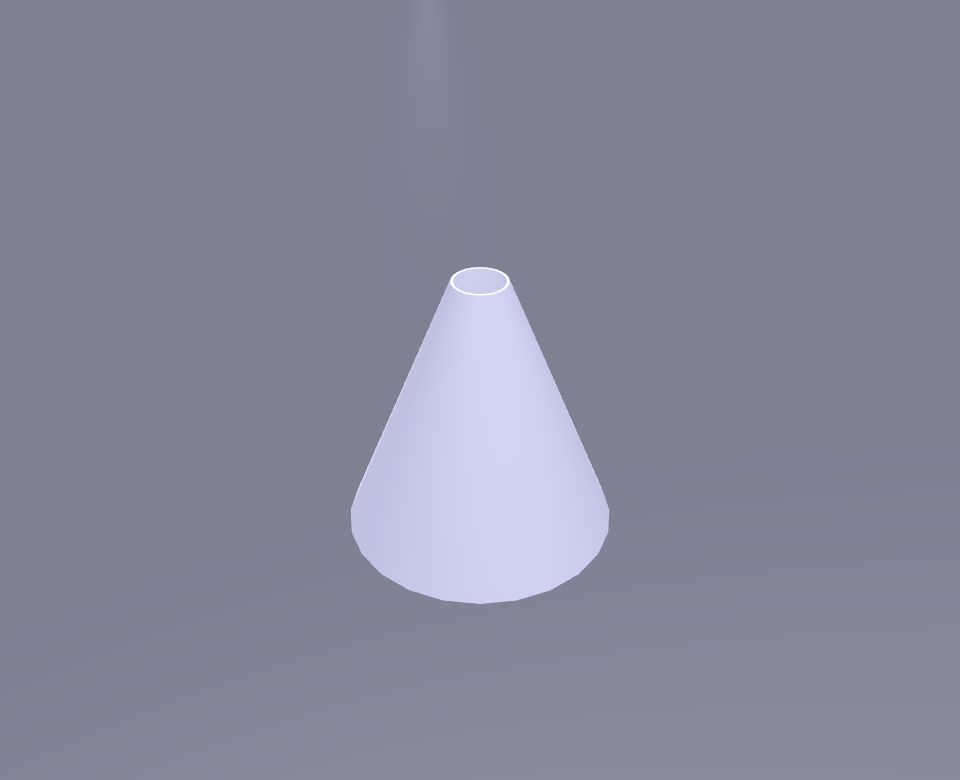
Funnel
Start with a Cylinder. Set Hollow to about 90% (for thin walls) and Taper both X and Y to around 0.5. The cylinder narrows toward the top while staying hollow inside -- a funnel. Reduce the taper to make it more gradual, or increase it for a steep cone.
Pyramid
Start with a Box. Set Taper on both X and Y to 1.0. The box narrows to a point at the top -- a clean four-sided pyramid. Use lower taper values for a truncated pyramid (flat top), or taper only one axis for a wedge-shaped roof.
Pipe Bend
Start with a Torus. Set Path to keep a quarter-arc (begin 0.0, end 0.25). Set a large Hollow -- the default Same profile is already round on a torus. You have a 90-degree pipe elbow. Adjust the Path range for different bend angles.
Base Shapes That Support These Controls
Parametric controls work on all of the standard primitive shapes. The effect of each control varies slightly depending on whether the shape uses a straight extrusion path (like a box) or a circular revolution path (like a torus).
Straight-path shapes (box, cylinder, prism) respond to twist, taper, and shear in straightforward ways -- the deformation happens along the height of the shape. Revolution-path shapes (torus, tube, ring) trade Twist for the ring-specific set -- skew, revolutions, radius delta, and hole size -- controls that only make sense when the path wraps around in a circle.
Quick Reference
| Parameter | What It Does | Good For |
|---|---|---|
| Path Cut (Profile on torus) | Removes a wedge from the cross-section | Pac-Man shapes, domes, open bowls |
| Hollow | Punches a hole through the center (up to 95%) | Frames, pipes, towers, tunnels |
| Slice (Path on torus) | Removes a section of the extrusion | Arches, half-rings, partial walls |
| Twist | Rotates the shape along its length (straight-path shapes only) | Spiral stairs, twisted columns, ribbons |
| Taper | Narrows or widens toward one end | Pyramids, funnels, wedge roofs |
| Shear | Offsets the top sideways | Leaning shapes, slanted roofs, parallelograms |
| Skew | Leans the whole extrusion path (torus family only) | Tilted rings, elliptical orbits |
Builder Tips
- Non-destructive means fearless. Every parameter can be reset to its default value. Experiment freely -- you cannot break the original shape.
- Combine controls. A hollow, twisted, tapered cylinder produces shapes that would be very difficult to build any other way. Stack effects for complex results.
- Start simple. Change one parameter at a time until you understand what it does. Then start combining them.
- Use these with the basic shapes from the Build Panel. Select any prim you have already placed, open the Shape tab, and the parametric sliders appear.
- Colors and materials survive. Changing a parametric control regenerates the shape but keeps all your colors, textures, and material settings intact.
- The Path cut on a torus is the fastest way to make arches, curved ramps, and pipe bends. Master this one trick and you will use it constantly.