Creating Worlds: Terrain, Vegetation & Import
The Build Panel shapes objects. This guide is about the ground they stand on: spinning up a brand-new world, sculpting its terrain, scattering forests across it, and importing whole regions from other virtual worlds -- then pushing all of it into your live space.
A world in poqpoq is more than a pile of prims. It has land you can raise into mountains, vegetation that carpets the hills, a biome, a name, and rules for who may enter and build. Three purpose-built tools handle the heavy terrain-and-nature work -- Terraformer, Landscaper, and Legacy Import -- and they all feed into the same place: your active world instance.
They live one click away, inside each world's card in the My Worlds panel. This chapter walks the whole pipeline, from the empty biome you pick at creation to the finished landscape you and your visitors walk through.
Starting a New World
Open the left shelf and expand My Worlds. Every world you own is listed here with its type badge -- WORLD for a full region, WORKSHOP for a small building space, ZONE for a special area -- alongside its age rating and public/private flag. At the bottom sit two ways to make something new.
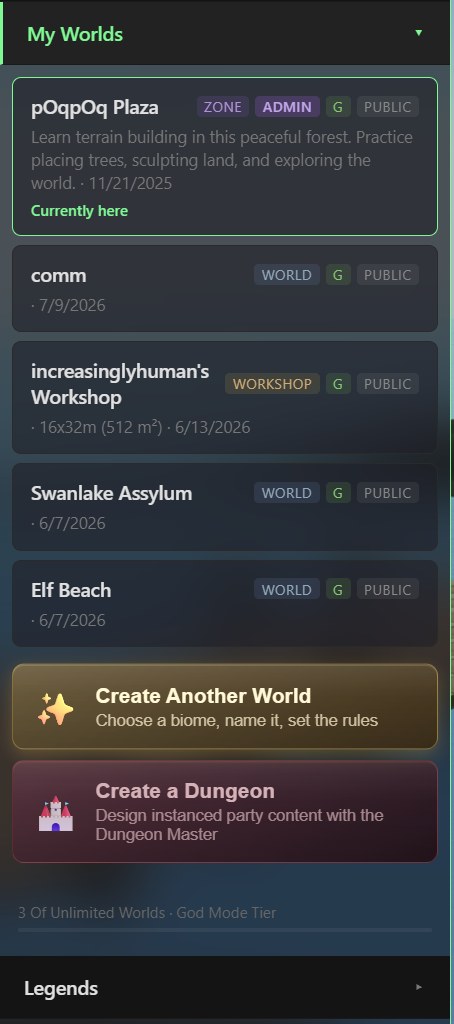
Create Another World
Choosing Create Another World asks one question first: where do you want to start from? Each option is a different biome -- a starting terrain and material palette you can build on or completely reshape later.
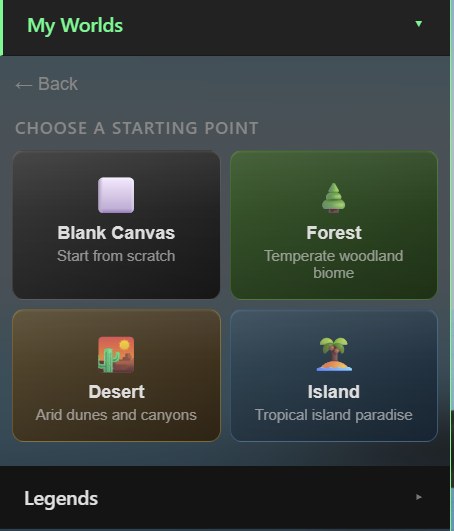
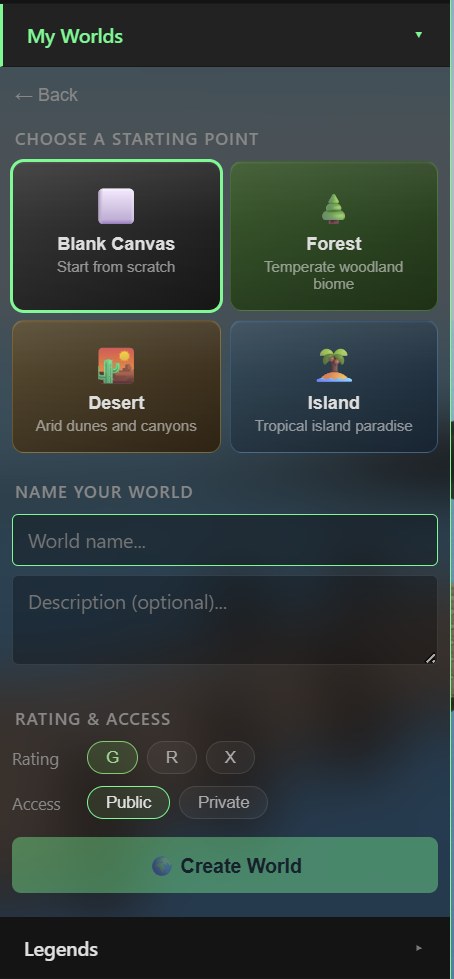
Pick a biome, then name the world, add an optional description, and set its rules before you create it:
- Starting point -- the biome card you selected above. This only seeds the initial look; Terraformer can replace the terrain entirely.
- Name & description -- how the world appears in your list and to visitors. The description is optional.
- Rating -- G, R, or X, the same content-rating scale used across poqpoq. Pick the one that matches what will happen in your world.
- Access -- Public (anyone can visit) or Private (only you and people you allow). You can change this later; building permissions are covered in Managing Your World.
Create a Dungeon
The second button, Create a Dungeon, is a different path: instead of an open region it builds instanced, party-scoped content with the help of the Dungeon Master. Dungeons spawn a fresh private copy for each group that enters, so loot and enemies are never shared or camped. The dungeon design flow is covered on its own -- see Dungeon Instances and Quest Loops in the World Guide.
The World-Building Pipeline
Once a world exists, its card in My Worlds expands to reveal the tools that shape it. Click your world to open it; the card shows Editing this world, a row of quick actions (visit, rename, delete), and three buttons that launch the heavy tooling.
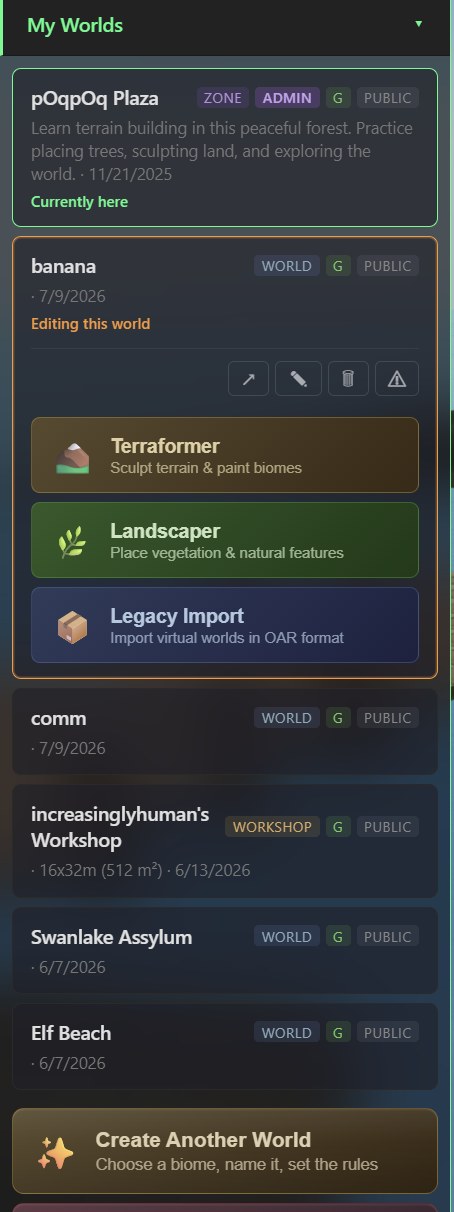
These three are full Black Box suite applications, not panels inside the world. Each opens in its own workspace, you shape your terrain or vegetation there, and then a single action pushes the result back into your live world. That "push into the active instance" step is the thread that ties the whole pipeline together:
A natural order is terrain first (Terraformer), then vegetation on top of it (Landscaper), but you can revisit either at any time -- each tool sends its own layer independently.
Terraformer -- Shaping the Land
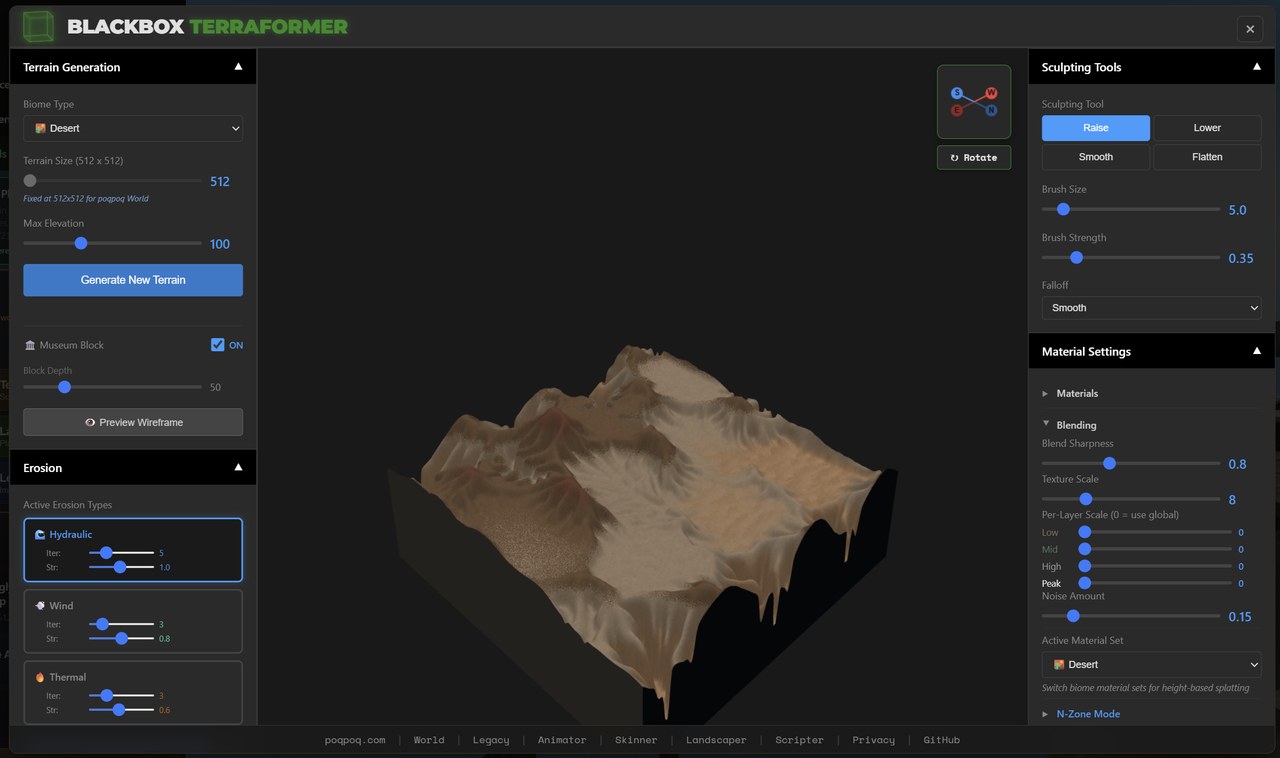
Terraformer is where flat ground becomes canyons, dunes, and mountain ridges. It has three stages you can mix freely: generate a base terrain, sculpt it by hand, and dress it with materials.
Generate a base
Pick a Biome Type and a Max Elevation, then Generate New Terrain for an instant landscape. Layer on erosion -- Hydraulic (water-carved valleys), Wind (dune drift), and Thermal (rocky slumping) -- each with its own iteration and strength, to weather the shape into something believable.
Sculpt by hand
The Raise, Lower, Smooth, and Flatten brushes let you carve exactly what you want. Tune Brush Size, Brush Strength, and Falloff for anything from a gentle hill to a sheer cliff.
Paint materials
Material Settings splat textures onto the terrain by height -- sand low, rock high -- with blend sharpness and per-layer scaling. Switch the active material set to re-skin the whole region for a different biome.
When the land looks right, Terraformer's world panel sends it to your instance -- the same "push to the active world" step every tool shares.
Landscaper -- Scattering Life
Bare terrain is lonely. Landscaper populates it with vegetation and natural features -- trees, ferns, ground cover, underwater kelp, and rocks -- using a scatter system rather than hand-placing every object.
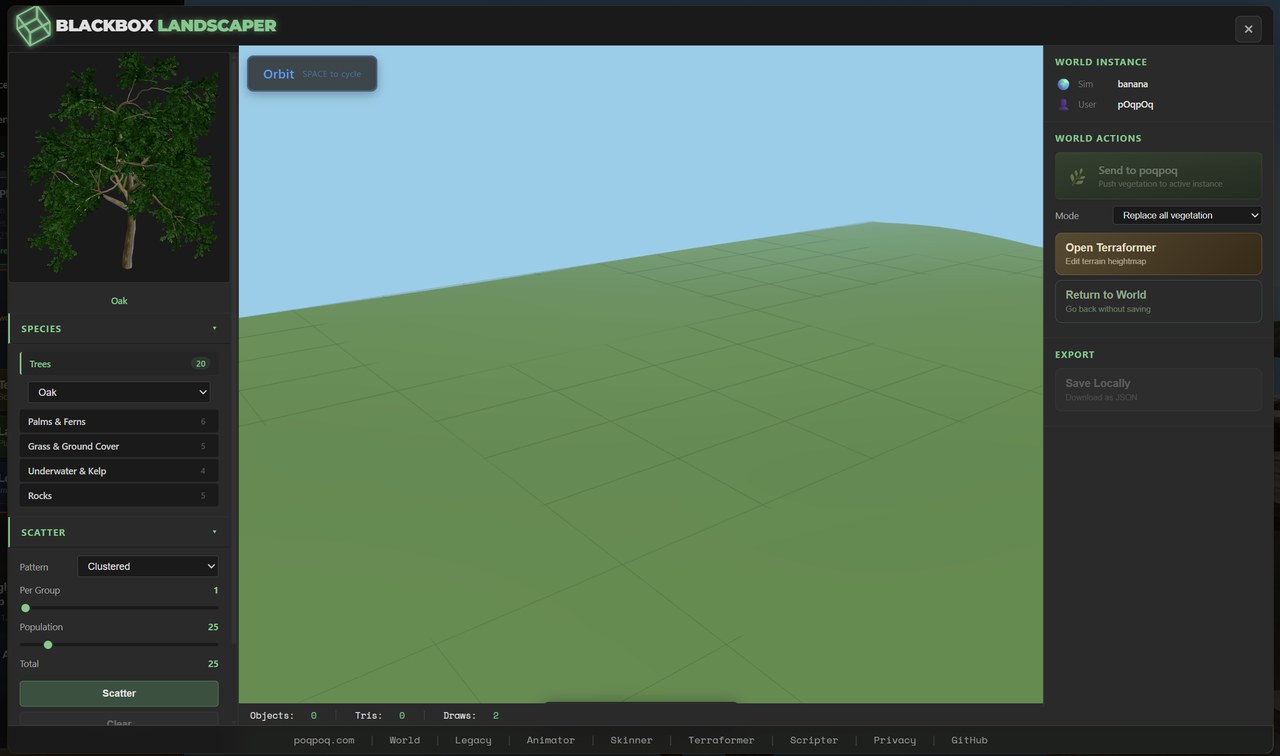
- Pick a species from the categories -- Trees, Palms & Ferns, Grass & Ground Cover, Underwater & Kelp, and Rocks -- then choose a specific model (Oak, for example) from the dropdown.
- Set the scatter -- a Pattern (such as Clustered), how many per group, and a total Population. Landscaper distributes them across the terrain for you.
- Scatter and review -- press Scatter to place them, orbit to check the result, and Clear to start over. Repeat with more species to build up layered ground cover.
- Send to poqpoq -- the Mode setting controls whether you replace all existing vegetation or add to it, then the push delivers it live to everyone in the instance.
Landscaper can also Save Locally as JSON -- a portable snapshot of your scatter you can keep or reuse -- and it links straight to Open Terraformer so you can hop between shaping land and planting it.
Legacy Import -- Bringing in Existing Worlds
The third button, Legacy Import, opens Black Box Legacy -- a converter that turns OpenSimulator region archives (OAR files) into poqpoq-ready 3D content. If you have a world built in OpenSim or a Second Life-style toolchain, this is how you bring it across instead of rebuilding it by hand.
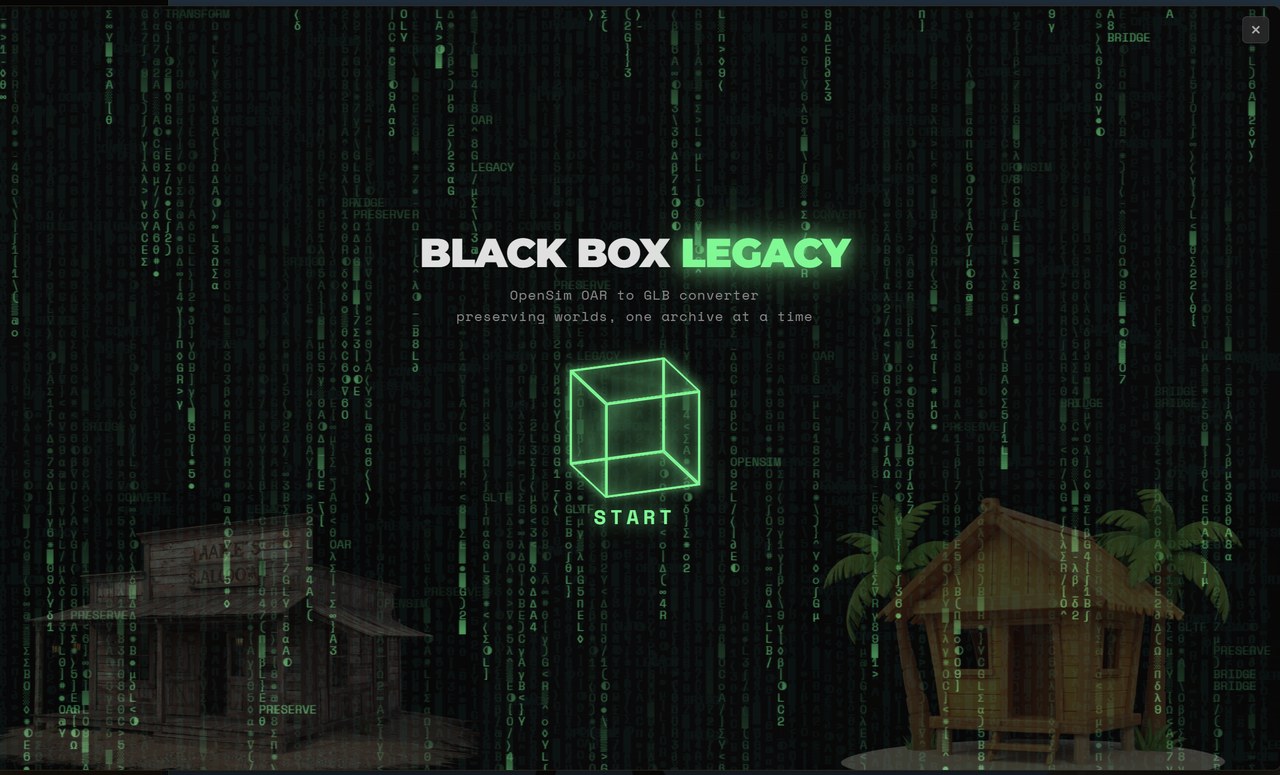
The conversion preserves geometry, textures, and layout so an imported region arrives recognizable rather than as a jumble. The deeper story of why cross-engine geometry is tricky -- and how poqpoq keeps imported shapes faithful -- is told in Bridging Worlds.
Pipeline Tips
- Terrain before trees. Shape the land in Terraformer first, then scatter vegetation in Landscaper -- plants follow the surface, so moving the ground afterward can leave them floating or buried.
- Watch the send Mode. Landscaper's "Replace all vegetation" wipes what is already there before adding the new scatter. Switch modes if you mean to add rather than replace.
- Save locally as you go. Landscaper's Save Locally (JSON) is a cheap checkpoint -- keep a copy before a big "Replace all" send.
- These are separate apps. Terraformer and Landscaper run in their own workspace and only affect your world when you send -- experiment freely, nothing is live until you push it.
- Terrain is 512×512. poqpoq worlds use a fixed terrain size, so plan elevations and features to that footprint.