Per-Face Texturing
Click a face, change its color or texture. Paint each side of a box differently, tile bricks on a wall, or put wood grain on a tabletop -- all without leaving the Build Panel.
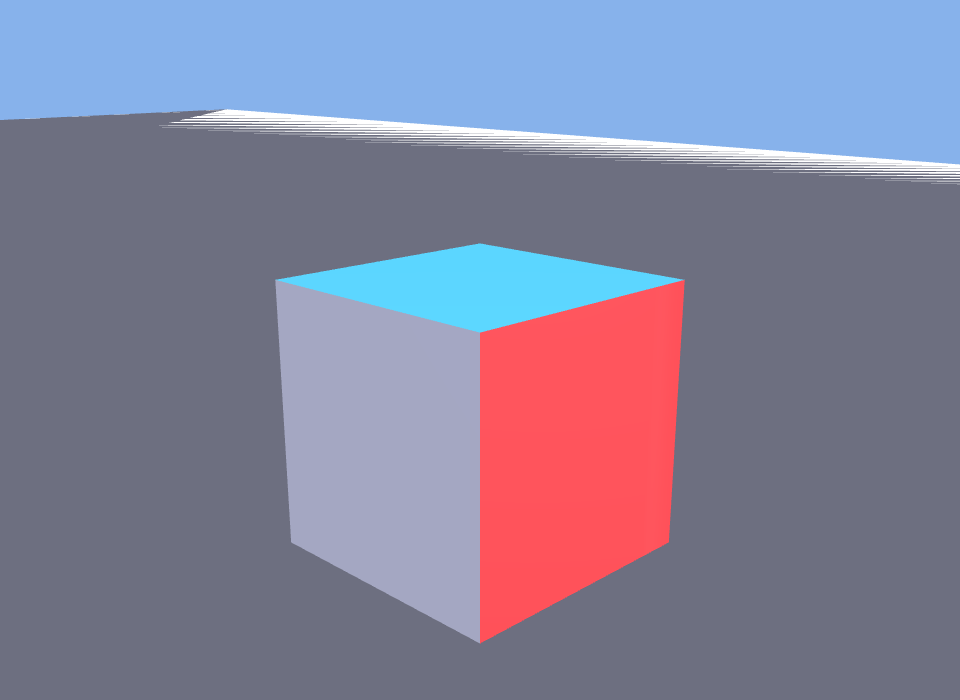
Every shape in poqpoq World is made of faces. A box has six faces (front, back, left, right, top, bottom). A cylinder has three (body, top cap, bottom cap). The face indexing is compatible with Second Life conventions, so experienced builders will feel right at home. Per-face texturing lets you select any individual face and give it its own color, texture, and material -- independent of all the other faces on the same object.
This is the foundation of expressive building. A single box can be a brick wall on the sides, a wooden floor on top, and painted plaster underneath. No need for multiple objects or external modeling tools.
Selecting a Face
There are two ways to select a face. Most creators use the in-world click method, but the panel strip is useful for precision or accessibility.
Click Directly in the World
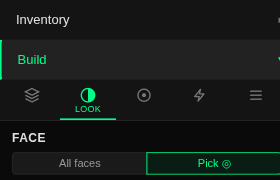
- Open the Look tab in the Build Panel with an object selected.
- Click the "Pick" toggle in the Face section at the top of the tab. Your cursor changes to a crosshair.
- Click a face on the object in the 3D view. The selected face highlights so you can see exactly which face is active. The cyan tint with a yellow outline you see on a picked face is the selection highlight, not paint -- it disappears when you deselect.
- Edit that face using the color picker, texture controls, and material presets below. All changes apply only to the selected face.
- Switch back to "All faces" when you want to apply a change to every face at once.

Use the Quick-Select Strip
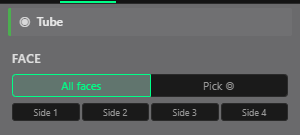
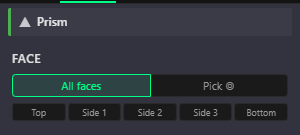
The Look tab also shows a row of small labeled boxes representing each face of the object. Click any box to select that face. This is especially useful on small objects where clicking a specific face in the 3D view is tricky, or when using a touchscreen.
The strip adapts to your shape: a box shows six face boxes, a cylinder shows three, and a sphere shows just one. An "All" checkbox at the end lets you quickly toggle back to editing all faces at once.
Faces by Shape
Different shapes have different numbers of faces. Here is what each shape gives you to work with.
| Shape | Faces | Face Names |
|---|---|---|
| Box | 6 | Front, Back, Right, Left, Top, Bottom |
| Cylinder | 3 | Body, Top, Bottom |
| Prism | 5 | Top, Side 1, Side 2, Side 3, Bottom |
| Sphere | 1 | Surface |
| Torus | 1 | Surface |
| Tube | 4 | Side 1 through Side 4 -- one face per flat side of the cross-section |
| Ring | 3 | Side 1 through Side 3 -- one face per side of the triangular cross-section |
Shapes with only one face (sphere, torus) still support textures and material presets -- you just do not need to worry about selecting a specific face. The quick-select strip always shows exactly the faces your object actually has, and it adapts as you change a shape's parameters.
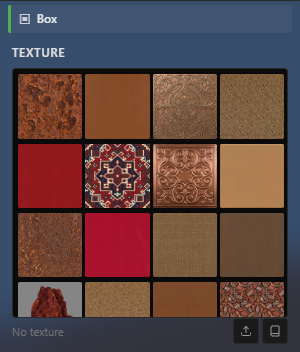
The Texture Library
poqpoq World ships with a built-in library of around 700 poqpoq-original seamless, tileable textures. They are ready to use at no cost -- no upload needed, no quota consumed. Just browse, click, and apply.
The library opens right inside the Look tab's Texture section as a scrolling grid of thumbnails, four across, loading more as you scroll. There is no category picker to navigate -- everything is in one continuous grid -- and the collection spans brick, concrete, fabric, metal, nature, stone, tile, and wood, plus a miscellaneous set of ornamental patterns. Scroll until something catches your eye, then click it.
Uploading Your Own Textures
If the library does not have what you need, you can upload your own images. Click the Upload button in the texture section of the Look tab, pick a JPG, PNG, or WebP image, and it is automatically resized and optimized before being stored.
Uploaded textures count against your personal texture quota. Free accounts can store up to 200 textures, while subscriber and creator tiers offer thousands more. Library textures are always free and unlimited.
UV Controls: Tiling, Offset, and Rotation
Once a texture is applied to a face, you can adjust how it sits on that surface using the Tiling controls. These appear in the Look tab below the texture picker.
Repeat (Tiling)
Controls how many times the texture repeats across the face. At 1× the texture stretches once across the entire surface. At 4× it tiles four times -- useful for brick walls, tile floors, or any pattern you want to repeat.
Repeat is an XY drag-pad with a 1× readout in the center: drag right for more horizontal repeats, drag vertically to change the vertical repeats, and the two axes move independently -- a brick wall might use 4 across but only 2 up. The small Reset to 1× button beside the pad snaps back to a single stretch. Note that choosing a different texture resets Repeat to 1×1.
Offset
Shifts the texture's starting position on the face. This is useful for aligning patterns across adjacent objects -- if two walls meet and the brick pattern does not line up, adjusting the offset on one wall fixes it.
Offset is a second XY drag-pad, just below Repeat. An offset of a full texture width or height wraps around to look the same as no offset on seamless textures.
Rotation
Rotates the texture on the face. Rotate is a dial, measured in degrees: turn it to 90° to make a horizontal plank pattern vertical, or use a small turn to add a subtle diagonal to a fabric texture.
Color Tinting
Every face has both a color and a texture. When both are present, the color tints the texture. A white color shows the texture as-is. A warm brown tint over a generic wood texture gives it a walnut look. A blue tint over a metal texture creates blue steel.
This means you can get many different looks from a single texture just by changing the color underneath. Combined with material presets (Matte, Metal, Glass, and so on), a small number of textures can produce a wide variety of appearances.
Material Presets on Individual Faces
Material presets from the Look tab work per-face just like colors and textures. If you have a face selected, clicking a preset applies it only to that face. With "All faces" selected, the preset applies everywhere.
This lets you build objects like a glass-topped wooden table -- the sides get the Wood preset, the top gets Glass -- from a single box shape.
Texturing Tips
- Start with the built-in library before uploading custom textures. It covers most building scenarios.
- Use color tinting to get many variations from a single texture. White shows the original, other colors shift its appearance.
- For a seamless look across adjacent objects, match the Repeat and Offset values on touching faces.
- Rotation is great for breaking up repetitive patterns. Even a 5-degree rotation can make a tiled floor look less mechanical.
- To remove a texture and go back to a plain color, use the Clear button in the texture section.
- Per-face editing applies only to shapes you build in-world. Imported 3D models keep their original textures.
A Note About Imported Models
Per-face texturing works on shapes you create using the Build Panel -- boxes, cylinders, planes, and so on. If you import a 3D model (a GLB file from a modeling tool or AI generator), its textures are baked in and cannot be edited per-face in the Build Panel.
To retexture an imported model, edit it in an external 3D tool and re-import the updated version.