Getting Started
From empty grid to living dungeon in minutes. No install. No plugins. Just build.
What You Need
- Chrome or Edge — recommended for best WebGL 2.0 performance
- A poqpoq account — only needed for Save to poqpoq. Standalone export works without sign-in.
- A decent GPU — rendering a 10×10 octile grid with textured walls and placed content is inexpensive, but an integrated laptop GPU from 2015 may struggle once you start layering props.
Two Ways to Use Dungeon Master
📚 Standalone Mode
Navigate to poqpoq.com/dungeon-master. Build, export as a .bbd file, re-import later. No account required.
Best for: Experimentation, sharing dungeons as files, learning the tool.
🌐 Launched from poqpoq World
Open DM from inside poqpoq World (dungeon arch → Edit). The editor runs in an iframe. The Save to poqpoq button replaces Export .bbd — saving sends the dungeon straight back to your world as a NEXUS instance.
Best for: Building dungeons that players in your world can actually enter.
The Fastest Path: Generate First, Edit Second
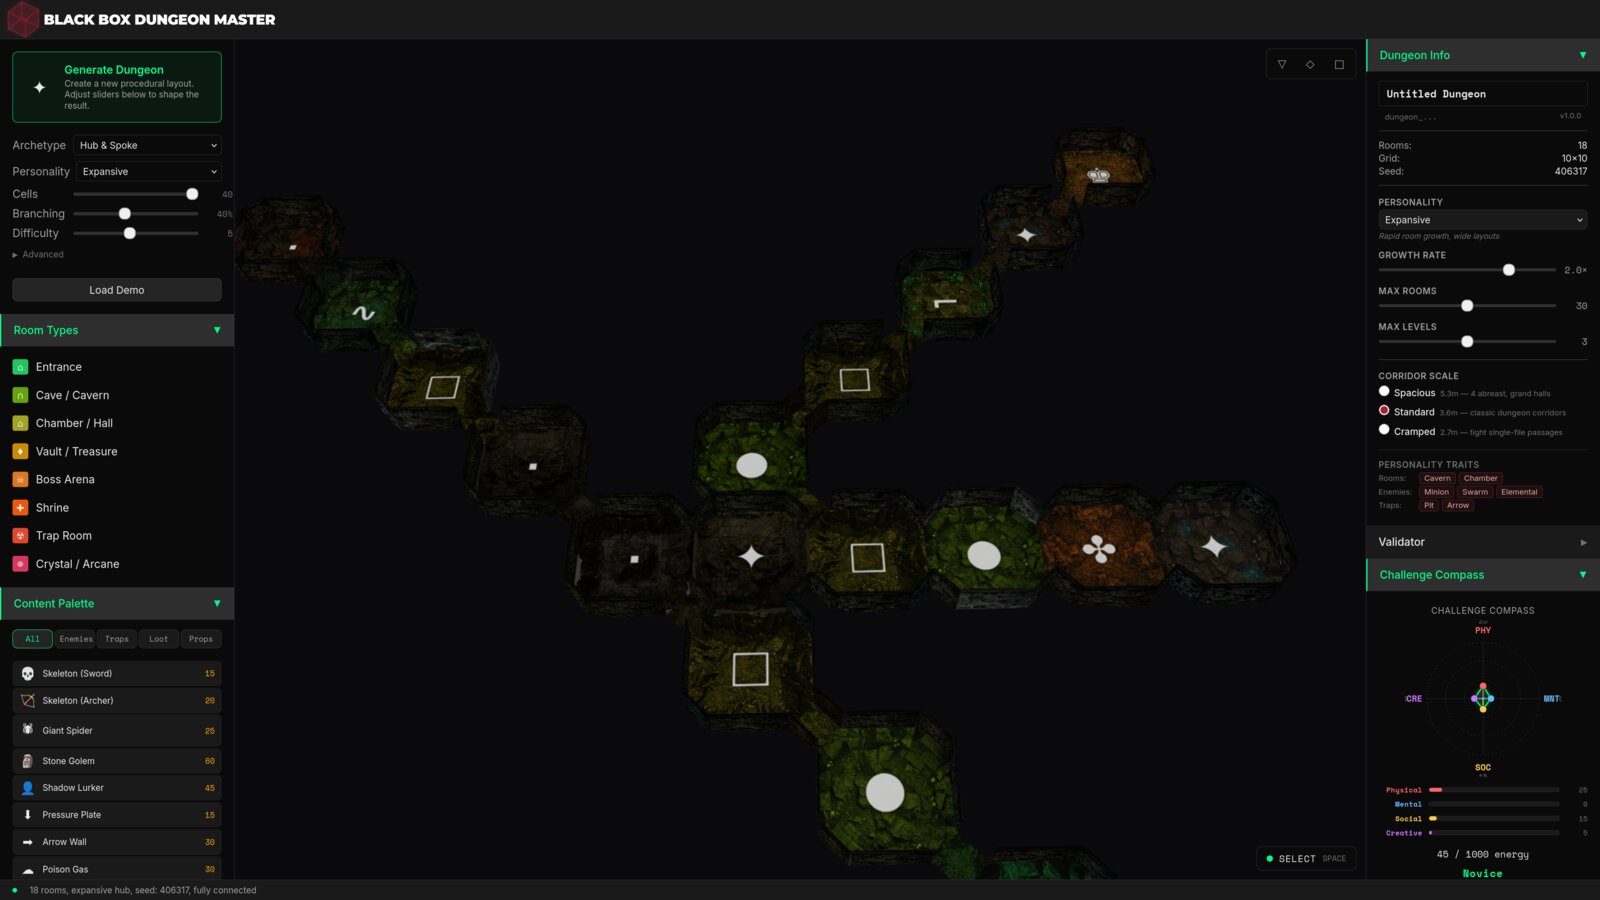
Starting from an empty grid works. Starting from a generated dungeon is faster. The left sidebar has a Generate Dungeon button (crimson, top-left). Above it: four knobs that shape what gets generated.
- Archetype — the overall layout family. "Hub & Spoke", "Maze", "Branching", etc. Picks the shape of the corridor skeleton.
- Personality — growth style. "Expansive" spreads out, "Claustrophobic" packs tight, others in between.
- Cells / Branching / Difficulty — sliders. More cells = larger dungeon; more branching = more side corridors; higher difficulty = more enemies and traps in the generated content.
Set the knobs, click Generate, get a full dungeon in one shot — rooms sized and linked, cell types assigned, content placed, Challenge Compass already reading. Then edit it. Move walls, swap cell types, tune content. The generator gives you a living starting point, not a throwaway draft.
If you'd rather build from scratch, skip the generator and go straight to the five-step walkthrough below. Both paths are supported.
Your First Dungeon (Manual Walkthrough)
A dungeon starts as an empty 10×10 octagon grid (with connector diamonds in the diagonal gaps — see The Octile Grid). Five steps to get from blank to saved:
- Open Dungeon Master Navigate to poqpoq.com/dungeon-master. The editor loads with an empty grid, the Mode Guide on the left, and the Challenge Compass in the bottom-right. You start in Select mode.
- Activate cells to lay the bones In Select mode, click octagon cells to toggle them active. An active cell is floor that exists; an inactive cell is empty space. Click connector diamonds to link octagons diagonally. Shape the floor plan before worrying about content.
- Cycle wall states Press SPACE to switch to Walls mode (cursor turns to crosshair). Click any wall edge to cycle through: SOLID → DOOR → GATE → GRATE → WINDOW → SECRET → OPEN → back to SOLID. The opposite side of the wall updates automatically — you don't have to match them manually.
- Place content Press SPACE again to enter Content mode (cursor turns to grab). Pick an enemy, trap, loot, or prop from the palette on the right, then click a cell to place it. Every placement shifts the Challenge Compass. Enemies push the Physical axis, traps push Mental, loot splits Social and Creative. Watch the tier label — Novice, Veteran, Legendary — tell you what you've built.
- Save In standalone mode, click Export .bbd to download your dungeon as a file. In embedded mode (launched from World), click Save to poqpoq — the dungeon posts back to your world as a NEXUS instance, ready to attach to a dungeon arch prop.
The Four Editor Modes
Every action in DM belongs to one of four modes. Cycle with SPACE, or click the mode label in the top-left Mode Guide.
- Select (default, green) — pick cells, paint cell types, multi-select for room clustering.
- Walls (amber) — hover to highlight wall segments, click to cycle states.
- Content (blue) — place enemies, traps, loot, and props from the palette.
- Navigate (white) — orbit, pan, zoom the camera without accidentally editing.
Start with bones, then walls, then content. Trying to place enemies on a half-drawn floor plan is frustrating because cells move around as you iterate on shape. Lock the geometry first, cycle walls second, populate last.
Reading the Panels
The right sidebar stacks four panels top-to-bottom. Each is collapsible.
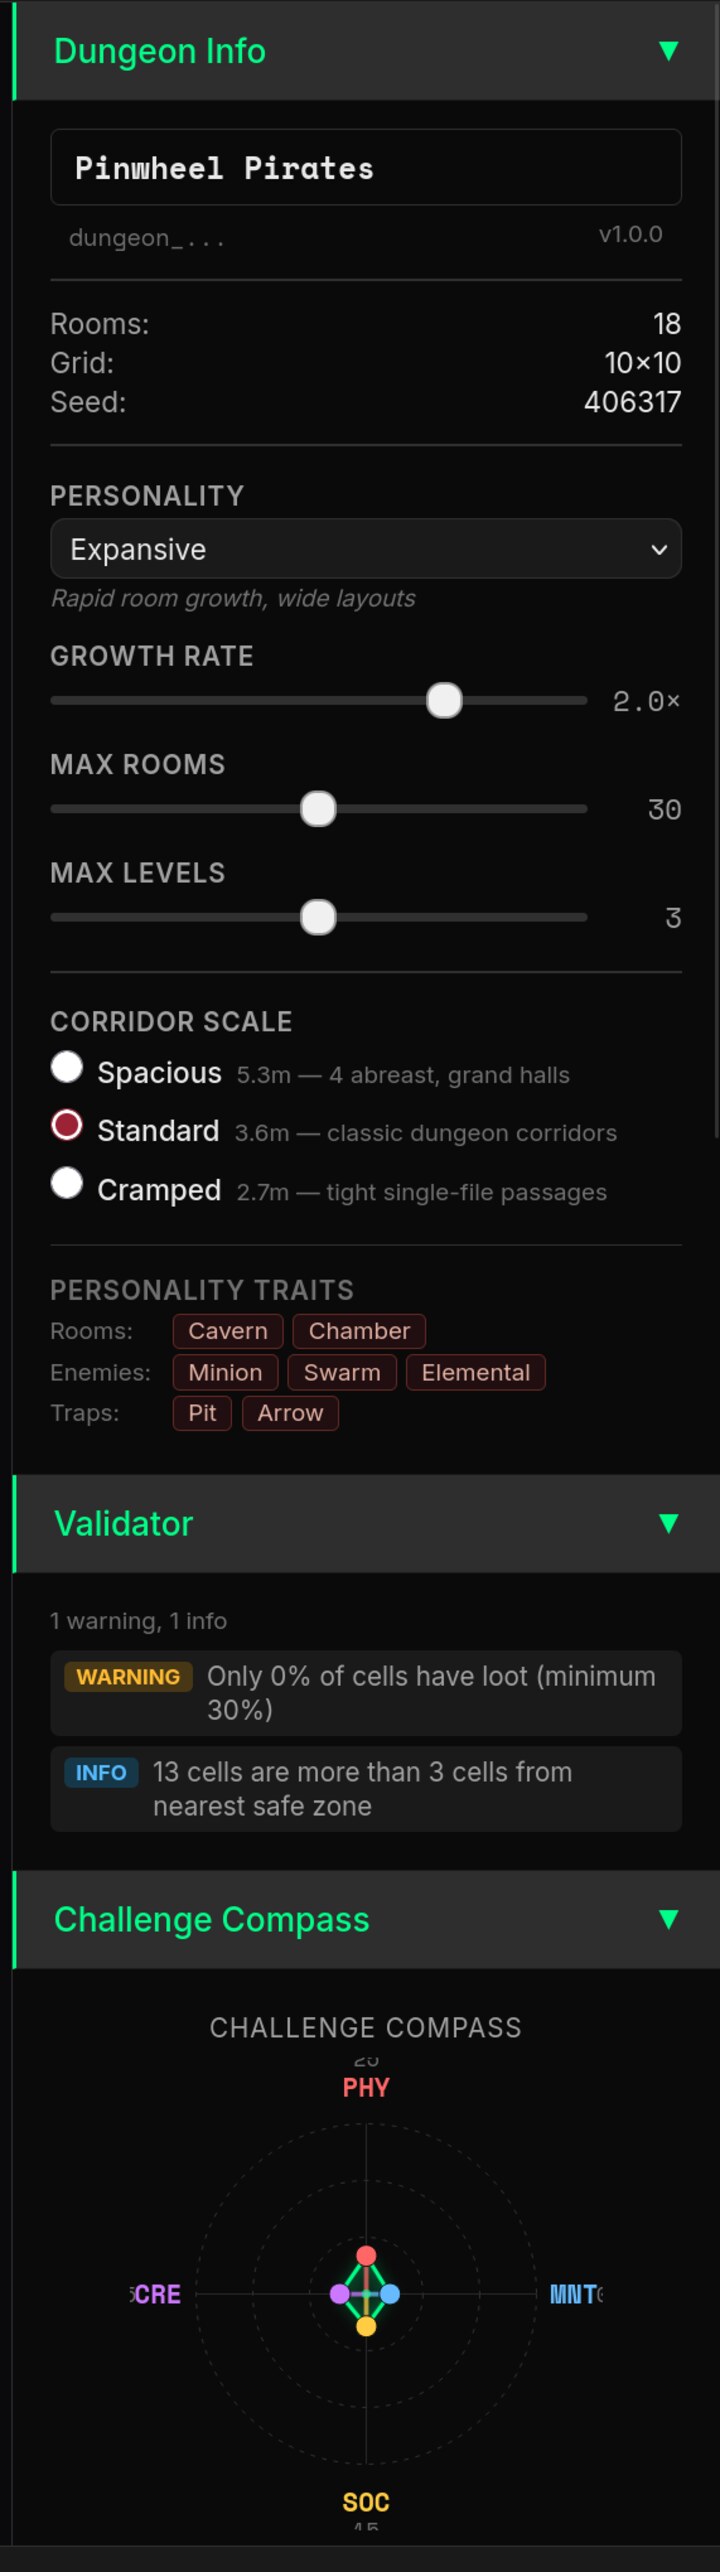
- Dungeon Info — top of the stack. Name, dungeon ID, stats (rooms, grid, seed). Below: Personality (Expansive, Claustrophobic, etc.), Growth Rate / Max Rooms / Max Levels sliders, Corridor Scale radios (Spacious 5.3 m / Standard 3.6 m / Cramped 2.7 m), and Personality Traits chips for rooms, enemies, and traps. These settings shape how the generator fills the dungeon and are persisted in the
.bbd. - Validator — continuously checks your dungeon against design heuristics (loot ratio, safe-zone distance, connectivity) and surfaces warnings or info chips. If you see
WARNING: Only 0% of cells have loot (minimum 30%), the validator is telling you your dungeon is combat-heavy without reward balance. Advisories, not blockers — you decide. - Challenge Compass — the four-axis balance radar. See Challenge Compass for the full picture.
- Minimap — color-coded grid overview with ~11 categories (Entrance, Cave, Chamber, Vault, Boss, Shrine, Hazard, Crystal, Water, Puzzle, Default). Useful for spotting unreachable cells or over-clustered areas at a glance. Your current selection shows as a green-outlined dot.